Android is Google’s mobile operating system that was first released in 2008. In October 2015, Google released Marshmallow, the 6th edition of the Android OS. This release of Android can be found running on mobile phones, set-top boxes, tablets, and even on smaller computers. Besides using tablets and smartphones for sending email and text messages, these devices are now heavily used for content consumption, such as for watching movies and listening to audio content. This guide will show you how media content can be played on Android.
The VideoView class
The VideoView class is the simplest way to play videos in your Android application. When working with video files, encoding is always an important consideration. Encoding involves the encoding and media types supported by the video player, support for multiple audio languages, as well as the video's bit rates and FPS (Frames Per Seconds).
The VideoView class supports the following video formats: MPEG-4 SP, H.264 AVC, VP8, H.263.
The source code below plays a video file from a raw resource in the application:
public class MainActivity extends AppCompatActivity {
EditTextmediaUrl = null;
VideoViewvideoView = null;
@Override
protected void onCreate(Bundle savedInstanceState) {
super.onCreate(savedInstanceState);
String videoUri = "android.resource://" + getPackageName() + "/" + R.raw.big_buck_bunny;
this.mediaUrl = (EditText) findViewById(R.id.mediaUrl);
this.mediaUrl.setText(videoUri);
this.videoView = (VideoView) findViewById(R.id.videoView);
this.videoView.setVideoURI(Uri.parse(videoUri));
this.videoView.start();
setContentView(R.layout.activity_main);
}
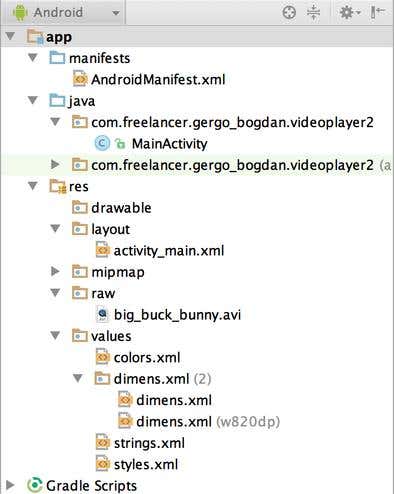
}In the MainActivity class, I have two fields, mediaUrl and the videoView. In the onCreatemethod I initialize the URI for the video, which stores the value in the videoUrivariable. The file R.raw.big_buck_bunny is stored under the res/raw folder in the project:
In the mediaUrl EditText, I set the resource URL so it is displayed on the user interface. Next, I initialize the videoView, set the media file using the setVideoUri() method, and start() the playback of the video.
The design of the application can be seen below:

The MediaController class
The MediaController class will display controls over the videoView I created before. I have to use the MediaController class because videoView class does not offer controls for controlling video playback. The MediaController class has buttons like play, pause, fast forward, rewind, and a track bar.
@Override
protected void onCreate(Bundle savedInstanceState) {
        super.onCreate(savedInstanceState);
        setContentView(R.layout.activity_main);

        String videoUri = "android.resource://" + getPackageName() + "/" + R.raw.big_buck_bunny;

        this.mediaUrl = (EditText) findViewById(R.id.mediaUrl);
        this.mediaUrl.setText(videoUri);

        MediaControllermediaController = new MediaController(this);

        this.videoView = (VideoView) findViewById(R.id.videoView);
        //
        // add MediaController
        //
        this.videoView.setMediaController(mediaController);
        this.videoView.setVideoURI(Uri.parse(videoUri));
        mediaController.show(15000);
}
In the source code, I created a new MediaController (namespace is android.widgets.MediaController). The current instance of the activity as the parameter is passed to the MediaController. I then set the mediaController to the videoView using the setMediaController() method. The mediaController.show(15000) displays the video controls for 15 seconds on the user interface. The show() method takes arguments in a millisecond.
The MediaPlayer class
Another option is to play video files using the MediaPlayer class. This class supports playing audio and video files from a local resource or remote hosts. It also supports streaming.
In order to use MediaPlayer to play streams or any content from the Web,two permissions have to be added to the Android Manifest file:
<?xml version="1.0" encoding="utf-8"?>
<manifest xmlns:android="http://schemas.android.com/apk/res/android"
    package="com.freelancer.gergo_bogdan.videoplayer2" >

    <application
            android:allowBackup="true"
            android:icon="@mipmap/ic_launcher"
            android:label="@string/app_name"
            android:supportsRtl="true"
            android:theme="@style/AppTheme" >
        <activity android:name=".MainActivity" >
            <intent-filter>
                <action android:name="android.intent.action.MAIN" />
                <category android:name="android.intent.category.LAUNCHER" />
            </intent-filter>
        </activity>
    </application>

    <uses-permission android:name="android.permission.INTERNET" />
    <uses-permission android:name="android.permission.WAKE_LOCK" />

</manifest>
The android.permissions.INTERNET needs to be added so the application can create a network connection to play media from remote hosts. The android.permissions.WAKE_LOCK helps the application stay awake, preventing the screen and the processor from going into sleep mode.
The MediaPlayer class supports a wide range of media formats. The full list can be found on this page.
    @Override
    protected void onCreate(Bundle savedInstanceState) {
        super.onCreate(savedInstanceState);
        setContentView(R.layout.activity_main);

        String videoUri = "android.resource://" + getPackageName() + "/" + R.raw.big_buck_bunny;

        this.mediaPlayer = MediaPlayer.create(getApplicationContext(), Uri.parse(videoUri));
        this.mediaPlayer.start();
     }
Initializing a new instance of MediaPlayer can be done using the create() static method, which should get a context. In my case, it's the ApplicationContext and the Uri for the video. I can use the same Uri used for the MediaController class.
    @Override
    protected void onCreate(Bundle savedInstanceState) {
        super.onCreate(savedInstanceState);
        setContentView(R.layout.activity_main);

        String url = "http://example.com/media/content/my-radio-stations";
        MediaPlayermediaPlayer = new MediaPlayer();
        mediaPlayer.setAudioStreamType(AudioManager.STREAM_MUSIC);
        mediaPlayer.setDataSource(url);
        mediaPlayer.prepare();
        mediaPlayer.start();
     }
The MediaPlayer can be used for audio stream playback too. In the code above, I invoke the base class onCreate method, then I set the content for the Activity to be my activity_main layout. I then initialize the media player and use the setAudioStreamType() method to define what to stream.
The AudioManager has predefined constants for streaming music, notification, phone ringing and voice calls.The playback data source for the media player should be set next.
I instruct the player to start and fetch the content from the remote host using the prepare() method. This operation can take a lot of time (sometimes up to 1-2 minutes, depending on network speed and device hardware). The MediaPlayer class supports asynchronous preparation and will start playback once the stream is prepared. To support async preparation of the player, the OnPreparedListener should have a new event handler which is invoked once the stream has been prepared. When using async stream preparation, the prepareAsync() method has to be used instead of normal prepare().
The ExoPlayer
MediaController and MediaPlayer classes are good when you have simple video files or content that can be accessed on websites, but there are some cases where these two classes cannot be used, such as when you have to display content accessed through Dynamic Adaptive Streaming over HTTP (DASH). Android offers developers two other classes for developing media players: MediaCodec and MediaExtractor.
The ExoPlayer is an open source project that supports DASH, SmoothStreaming, HLS, MP3, MP4, WebM, M4A, AAC. The minimum Android version for using ExoPlayer is 4.1, because the player uses the MediaCodec class from Android API,which was added in Android 4.1. On GitHub, there is a project that helps to demonstrate all the use-cases of the ExoPlayer.